- Getting set up for this workshop
- What is Node?
- Introduction to Node for Max
- Setting up local Node for Max client-server applications
- Creating a remote server on Heroku for your Node for Max client
- Using a web page interface
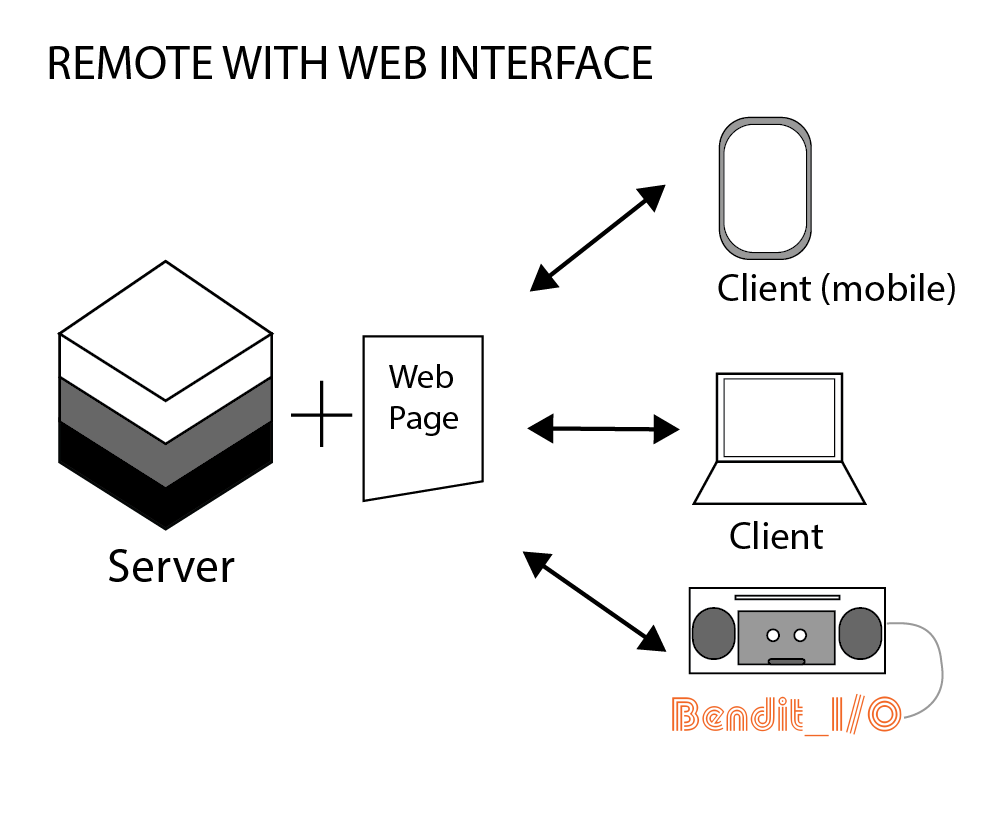
Using a web page interface
A web page interface (served by a remote server) allows for different interactions/interfaces than previously mentioned. The interface can use common web tools for responsiveness, formatting, and dynamic content. It’s possible to still have non-browser based clients (like Max) connect to this server – to receive server messages.
For example:
	Serving a webpage allows for mobile phones, tablets, etc.
- Create a webpage where interactions communicate to the server
- The remote server should point to a webpage
We will use ‘Arena Sequencer’ as an example of implementing a remote server with a webpage interface and uses Node4Max. In performance, Arena Sequencer uses Ableton with Max4Live.
Remote Server
Please reference the previous pages regarding setting up a remote Heroku server before proceeding.
Create a webpage with interaction-based events
- create an html file
- include interactive elements (buttons, sliders, text, etc.)
- include event messages to server based on interaction
Create an html file
The bare minimum for this demo is a button element with an assigned id.
Code to Arena Sequencer’s HTML page.
Live version of the Arena Sequencer HTML page: http://moxsonicapp.herokuapp.com
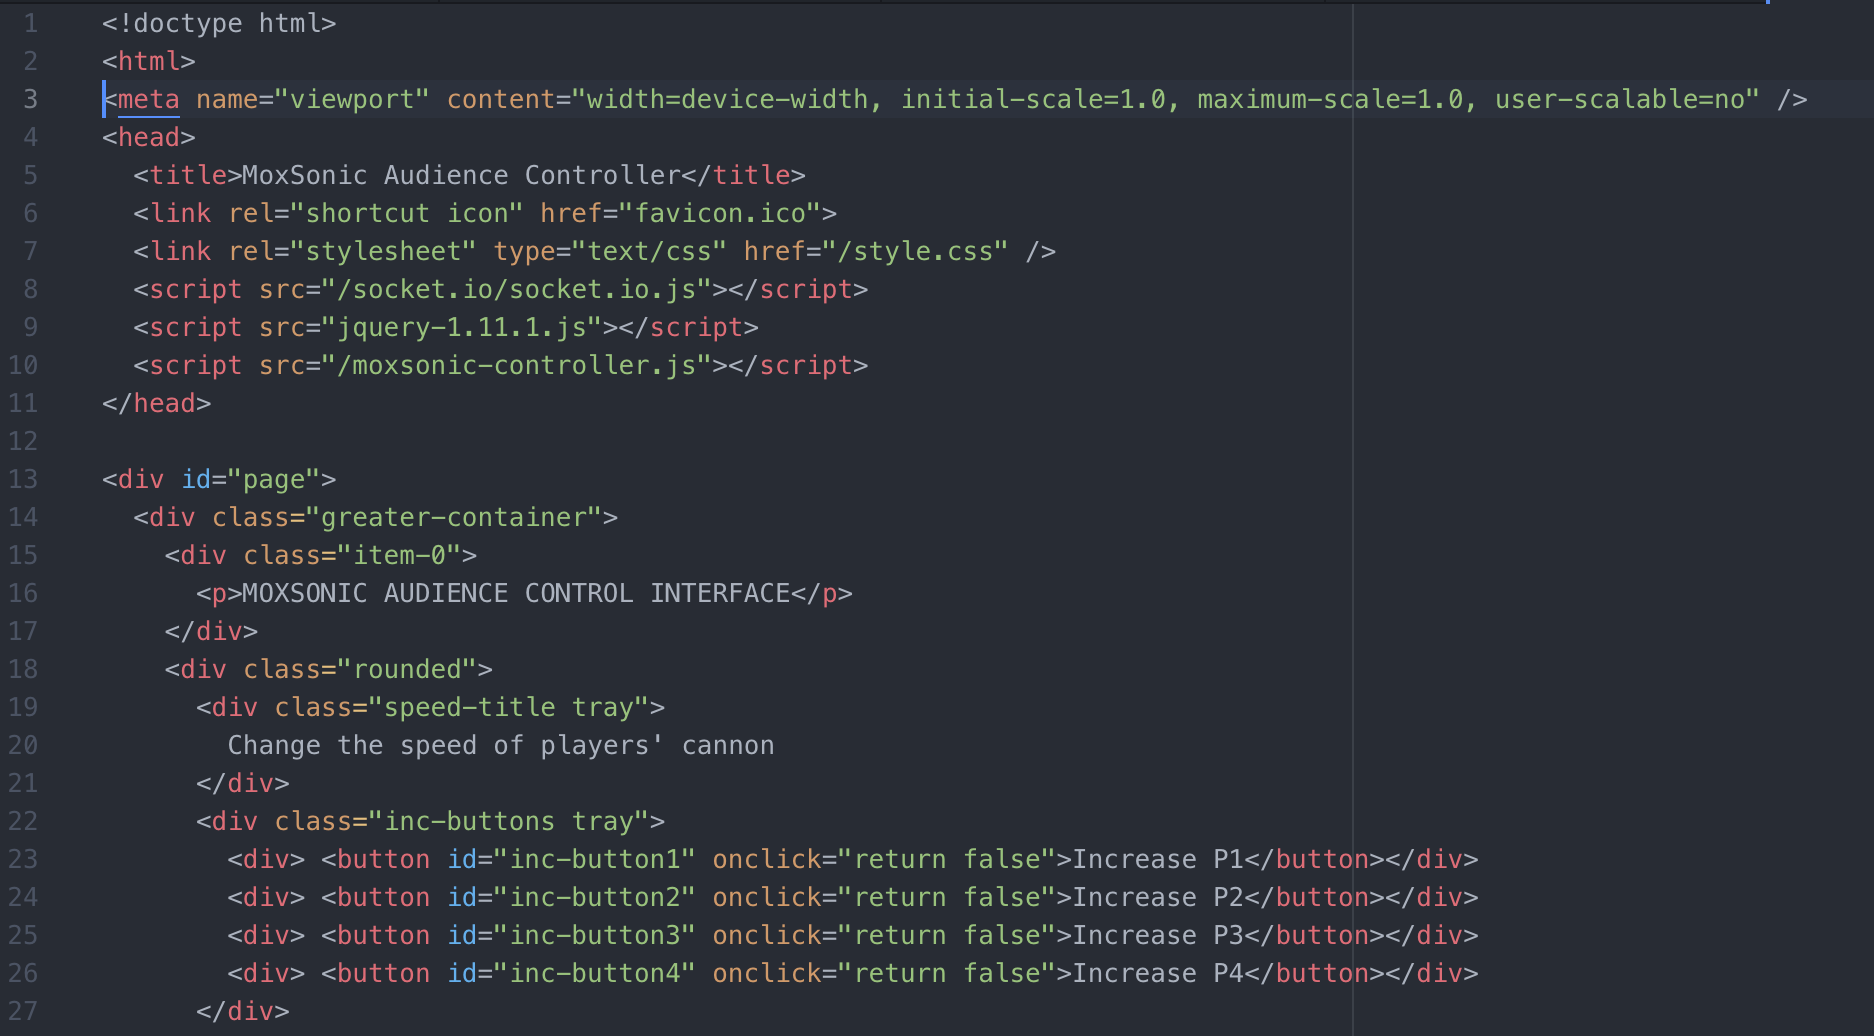
Notice the button elements near the bottom of the image with id tags of 'inc-button1', 'inc-button2'.
Based on the button element’s id, we can use their button interactions to trigger an event that sends (emits) a message to the server.
You can have the code that connects the button interaction on the HTML or a referenced separate file. Notice the line below that is included in the HTML file – this is a reference to the button element interaction event and messages to the server code:
<script src="/moxsonic-controller.js"></script>
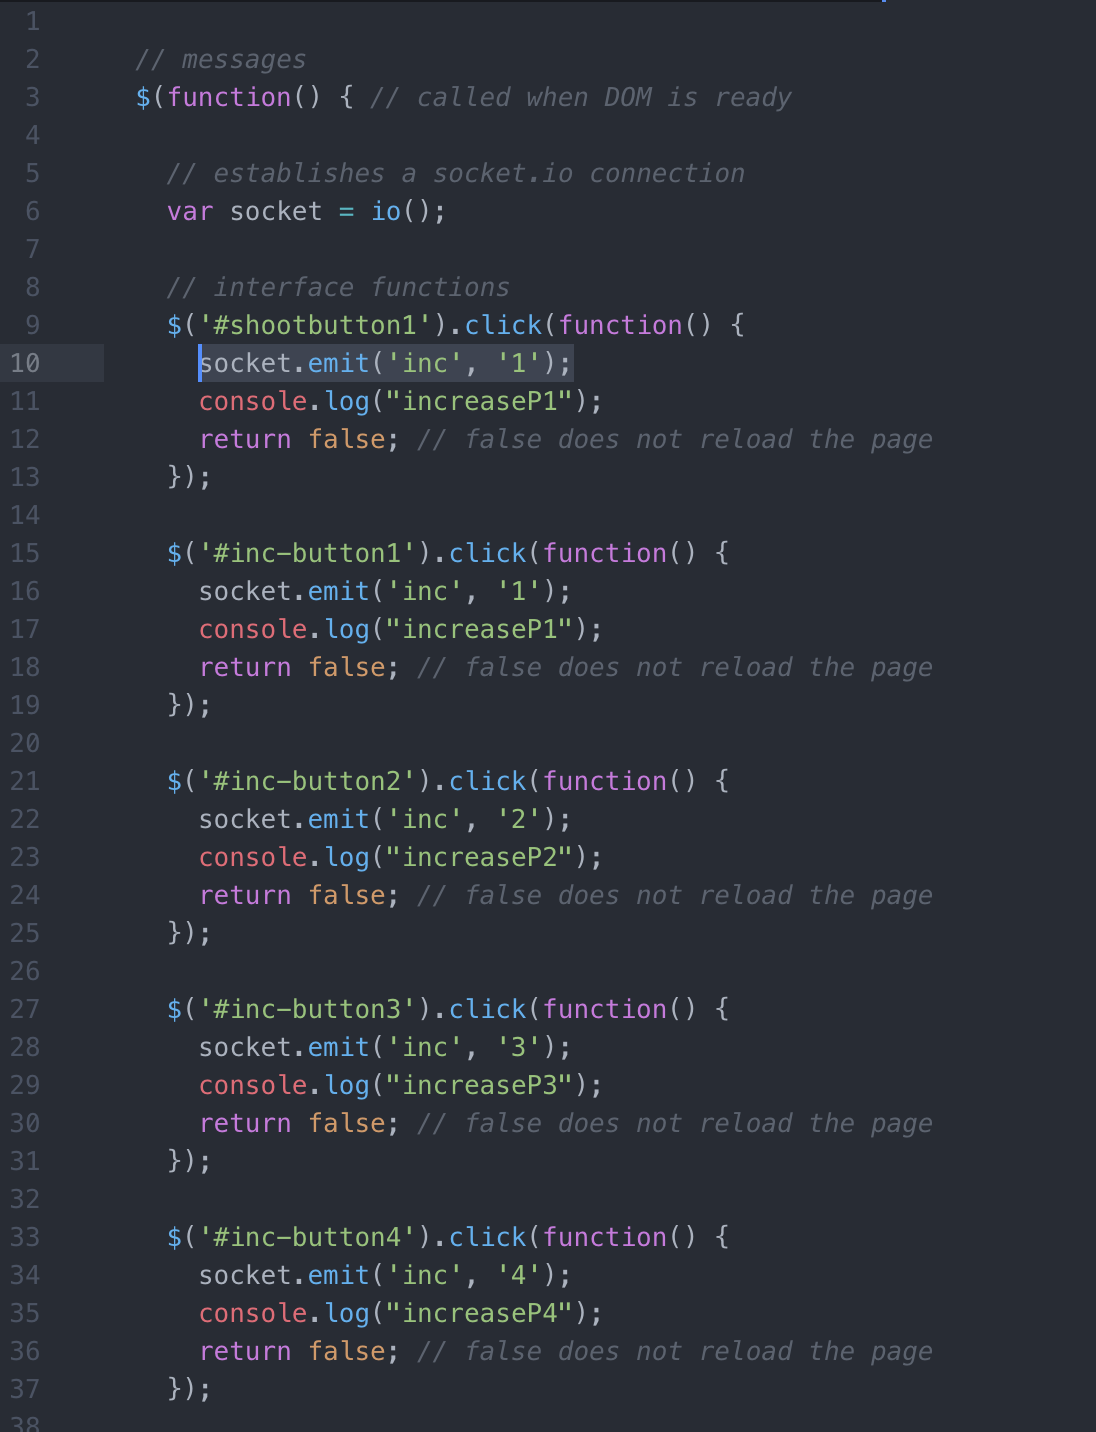
Link to the moxsonic-controller.js file.
The example in this image uses jquery.
An example for js:
const inc-Button1 = document.getElementById('inc-button1');
incButton1.addEventListener('click', function(e) {
socket.emit('inc', '1');
console.log('increment button 1 was clicked');
});
For examples with JavaScript: https://gist.github.com/aerrity/fd393e5511106420fba0c9602cc05d35)
Notice that we used the id name from the html page inc-button1. In order to reference that button’s interaction event, we have a local variable, which we call inc-Button1.
In both examples, notice the line socket.emit('inc', '1');. This commands a message ‘inc 1 ‘ through socket.io (to the server).
The server should be listening for a message containing ‘inc’ – where it’ll have its own logic.
Webpage hosted on server
The server from previous examples can augmented to:
- Serve a webpage
- That webpage should, based on interactions on the page, send messages to server.
How to:
Serve a webpage: The server should point visitors to a webpage. This example shows how to point visitors to a ‘public’ folder.

Refer to the image – as your object reference may be different the this example. Lines 17 and 20 point the visitors to html page.
node/socket events based on page
Let’s compare the event coding.
Referring back to the server’s Link to server file and the webpage’s (button event) code on moxsonic-controller.js file.
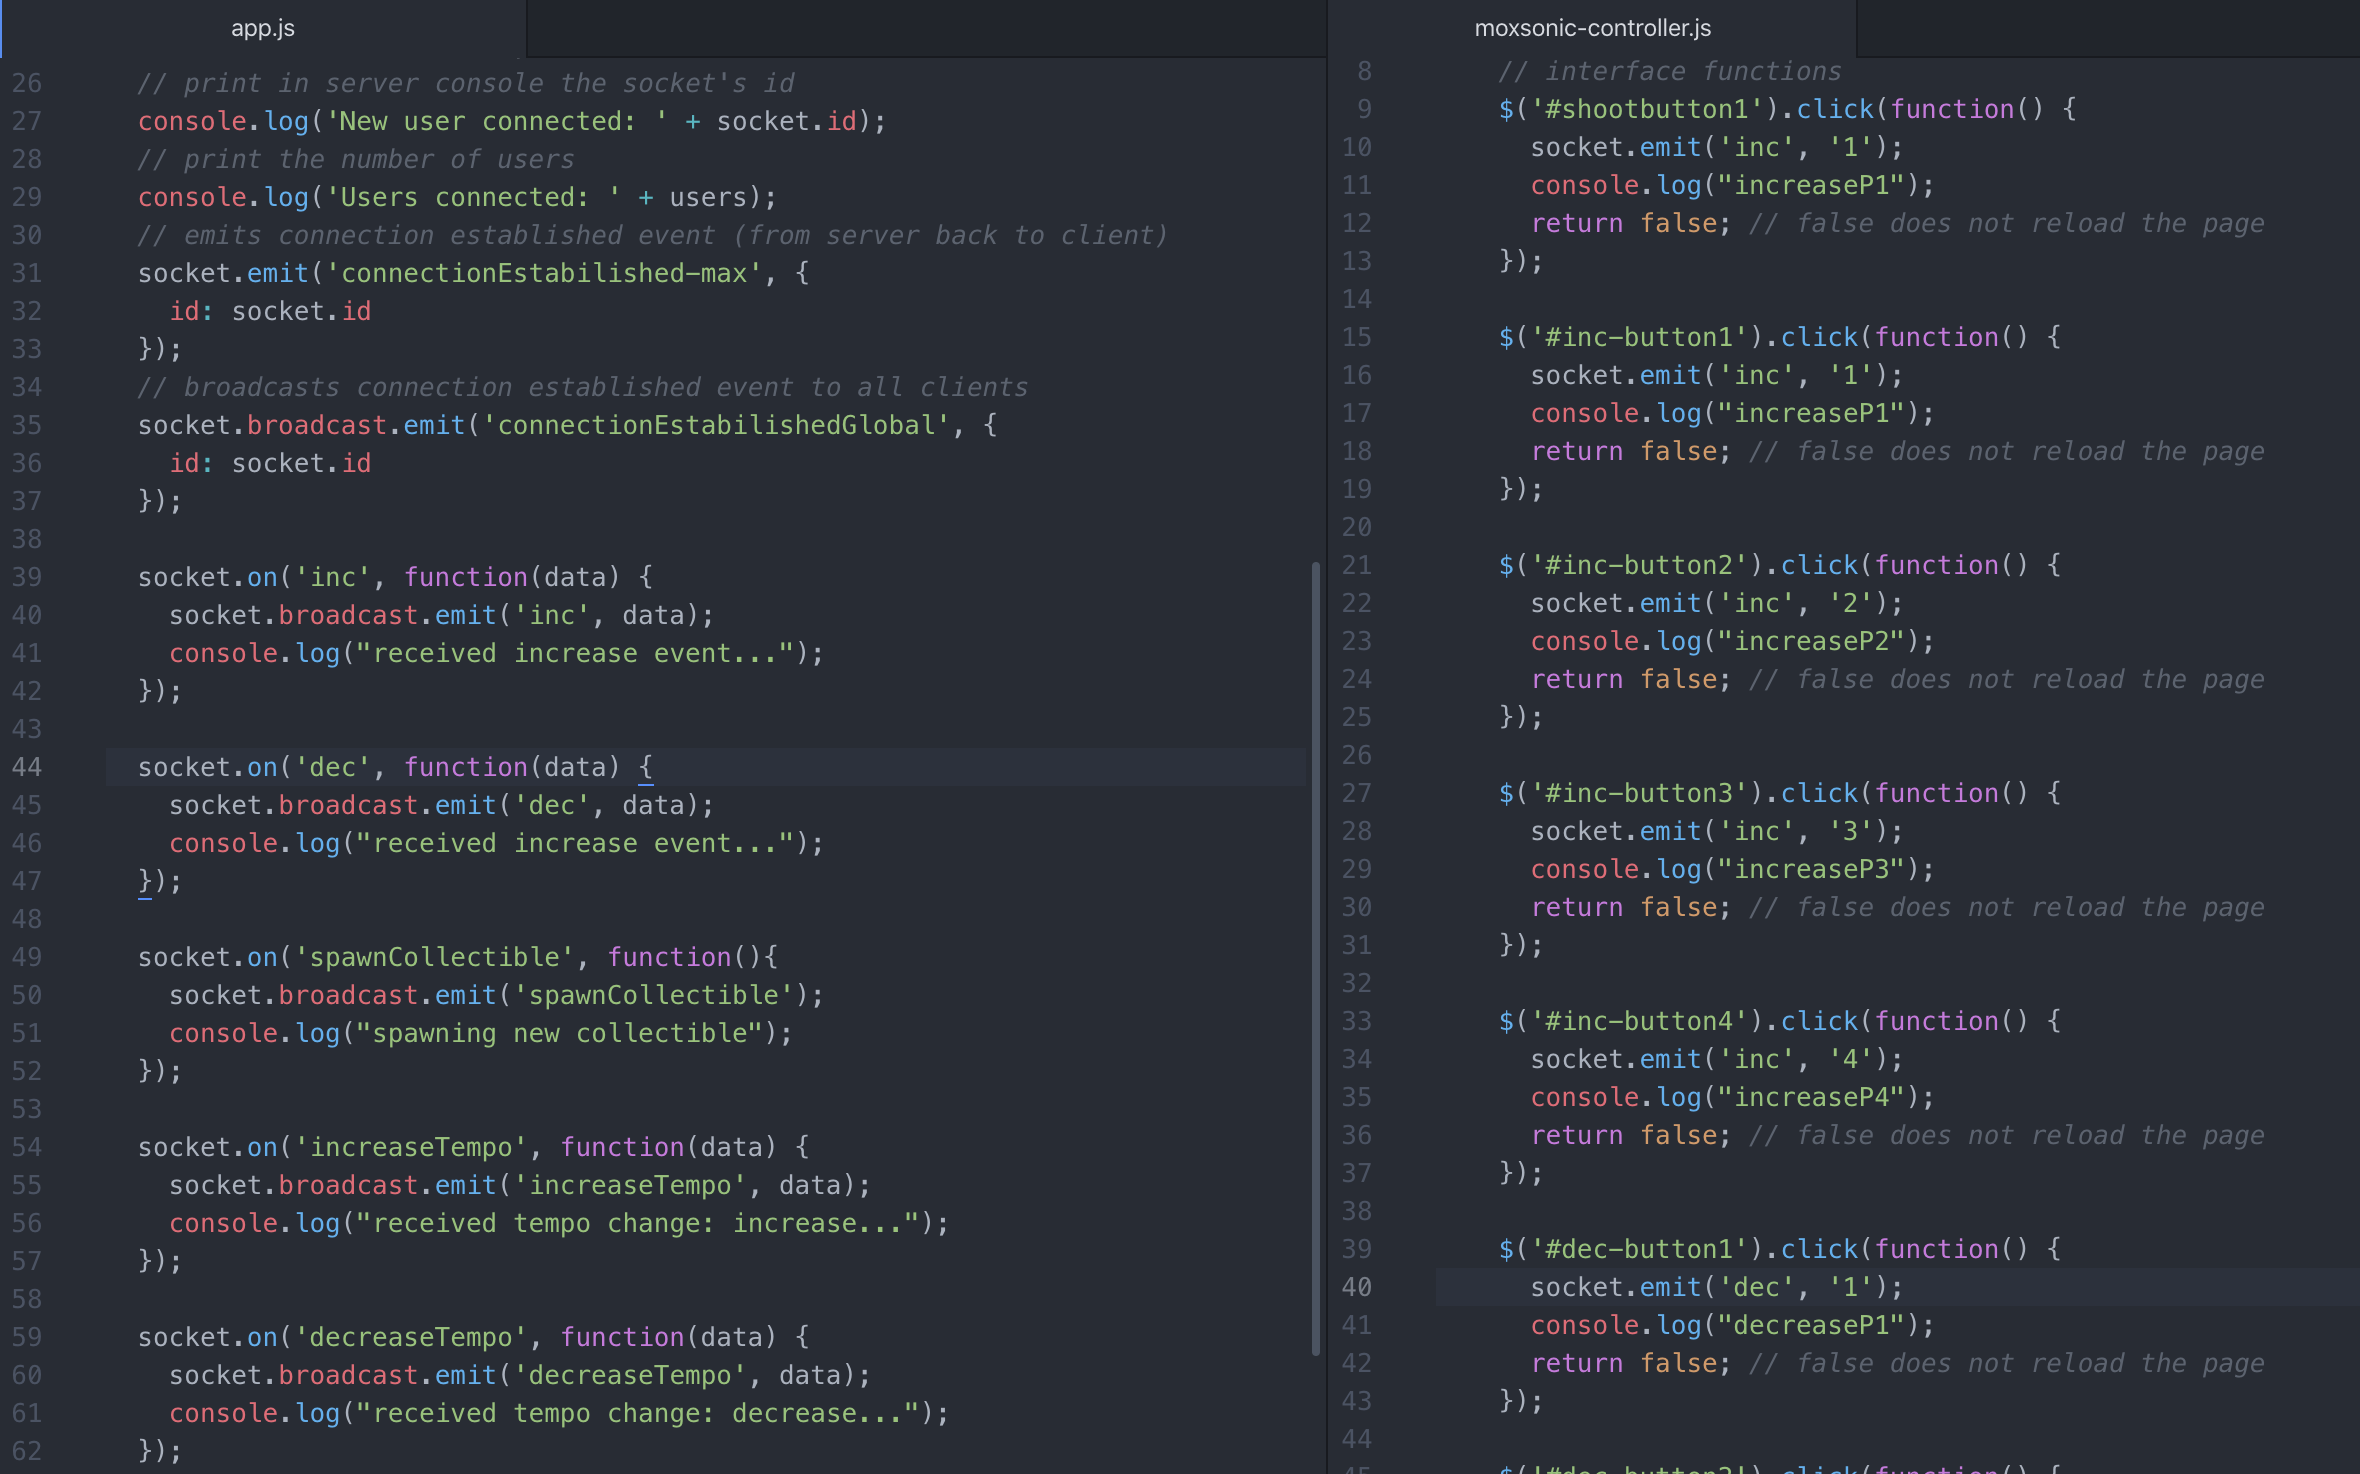
Notice the format of the message system. Emit (and its variations) is used to message to the server, and the server after receiving certain messages, ‘broadcasts’ to other clients. Broadcasting is only one method of sending messages. Reference the link below for more variants of sending messages.
Some debugging lines of code are included console.log("received increase event...");
Cheat Sheet to emit on socket.io
On the server side, you’ll notice socket.on('XXXmessageName', function(data) etc - this is a listener on the server, waiting to receive a message with the same key/flag AND then calling a function (also handling data that it receive).
In this example, the ‘emit.broadcast’ sends me the message to all connect clients.