- Getting set up for this workshop
- What is Node?
- Introduction to Node for Max
- Setting up local Node for Max client-server applications
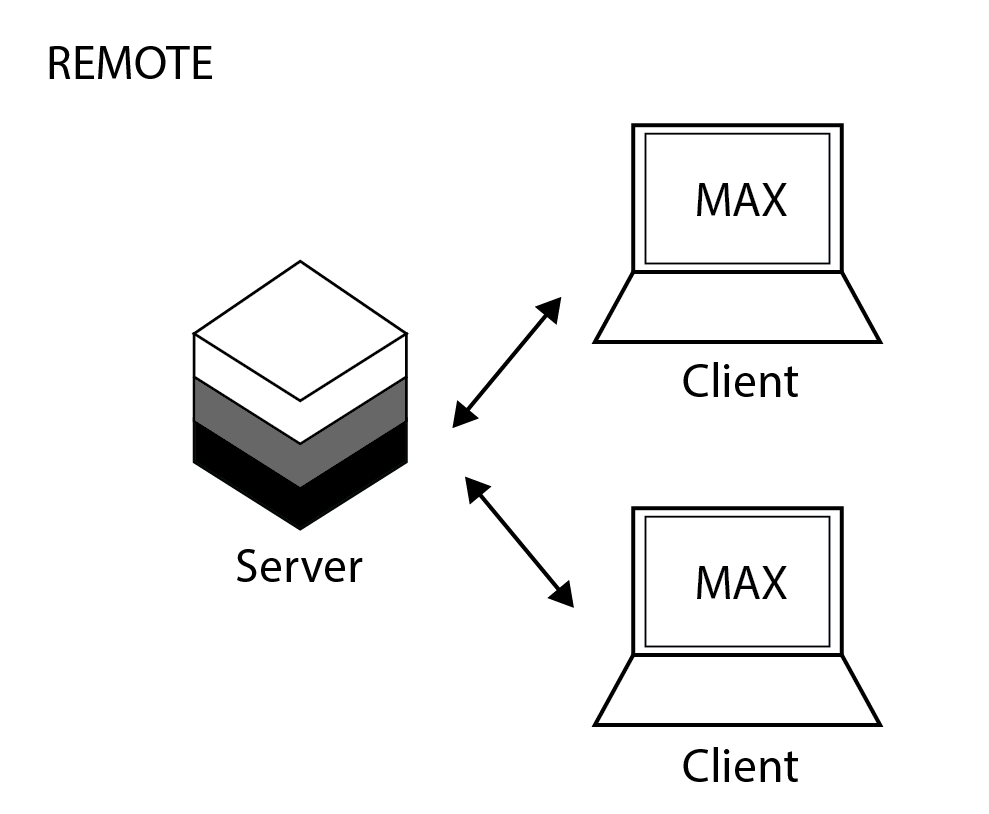
- Creating a remote server on Heroku for your Node for Max client
- Using a web page interface
Example client and server code for the remote networked Node setup used in the piece Hydrokardia can be found here:
Server - hosted on Heroku Client - including performance patches
Creating a remote server on Heroku for your Node for Max client
Once you’ve built your server and tested it locally, you can host it online and have clients connect to it remotely using a hosting service like Heroku. Here are some steps on how to host your Node server on Heroku:
-
First, create a Github repo for your project files and sign up with Heroku. Once you’ve signed up, download the command line interface tools here.
- Now that we’ve got the basics set up, let’s take the
max-socketIO—local-server.jsfile we used earlier and get it ready for remote hosting.- Create a new directory and recreate the
max-socketIO-sever.jsfile. Rename itmax-socketIO—heroku-sever.jsjust for clarity. - You’ll need to build a new
package.jsonfile by runningnpm initin this directory. - Next, we’ll install any dependency packages that we need for our app to work. For this example, we need express and socket.io. So let’s run
npm install express --saveandnpm install socket.io --saveThe MaxAPI will only be used by our client patch, so the server won’t need it. - Open up your
package.jsonfile and your should now see a section that lists you’re dependencies. - There’s one last thing we’ll need to add to our package file: a
startscript that specifies which file Node will run once Heroku fires up the server. For this example, you should add the following into yourpackage.jsonfile:"scripts":{ "start": "node max-socketIO-heroku-server.js" },
- Create a new directory and recreate the
- Once the package file is built, let’s install these dependencies into our app directory. In your terminal, run
npm install. - When the install finishes, fire up your server locally to make sure everything works properly on your own computer. Heroku includes its own testing script that you can use to do this by running
heroku local webin your terminal. - Since it’s a good idea to push this entire project to Github eventually, we should take care of one last step before finally putting our server app on Heroku. In your app’s directory, create a new file named
.gitignore. This file will keep track of items in our directory that we don’t want pushed to our git repo. Ideally, we don’t want any copies of our node modules or build artifacts being hosted on Github, so open the.gitignorefile and add:/node_modules npm-debug.log .DS_Store /*.env - At this point you should commit all of your changes to your git repo (learn about doing that here), but for now we’ll jump right into deploying this server to Heroku.
- In your app’s directory, run
heroku loginand press any key to open a browser window. Enter your login credentials when prompted. - Next, run
heroku createto publish your app to Heroku. - You can change the default name that Heroku assigns to your app by running
heroku apps:renamefollowed by the new name that you’d prefer, the –app flag and the old name assigned to your app by Heroku. Here’s an example:heroku apps:rename noderemoteworkshop --app damp-reef-50960
- In your app’s directory, run